Build Redux
Rear I/O Realignment Guide
During shipping your PC may bend and flex due to external forces. In some systems this creates enough movement to Misalign the rear I/O (I/O = Input Output) ports on the back of your mainboard. Our team is working on fixing this but if your system happens to be affected, this guide will show you how to resolve the issue.
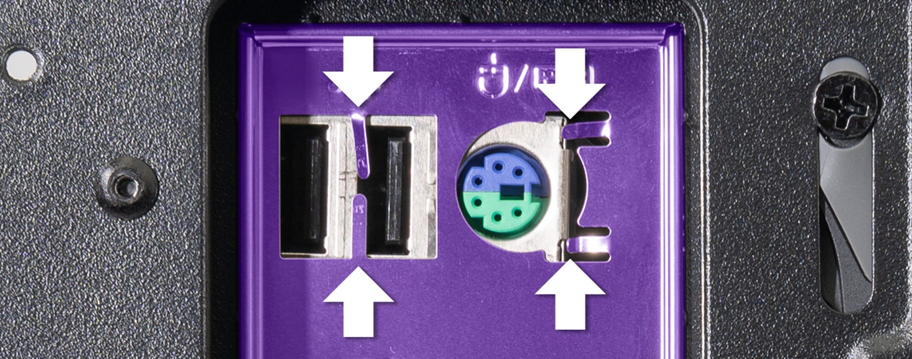
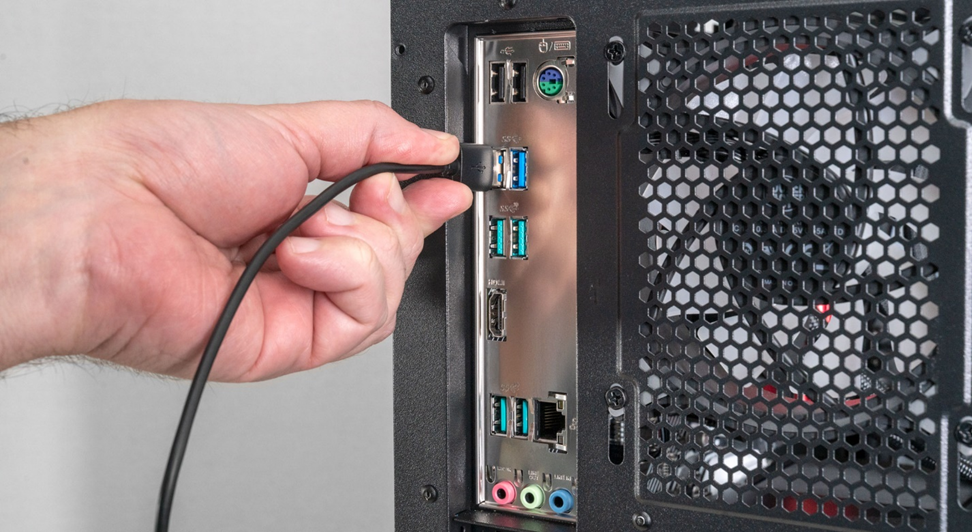
STEP 1: Inspect the mainboard I/O ports on the back of your system. You may see some or most of them are obstructed by tabs on the rear I/O shield, preventing USB and other devices form plugging in properly. The effected area is shown below.

Below you can see the small metal tabs are blocking the USB and pS/2 ports on our example board.
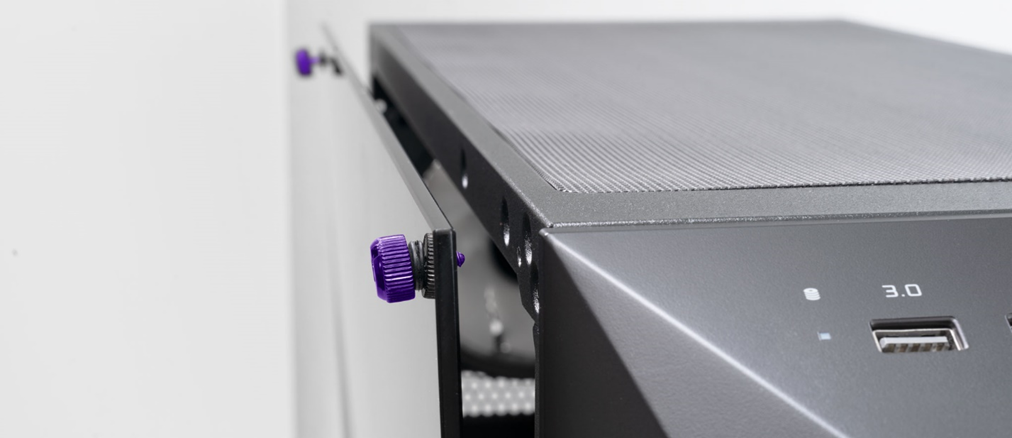
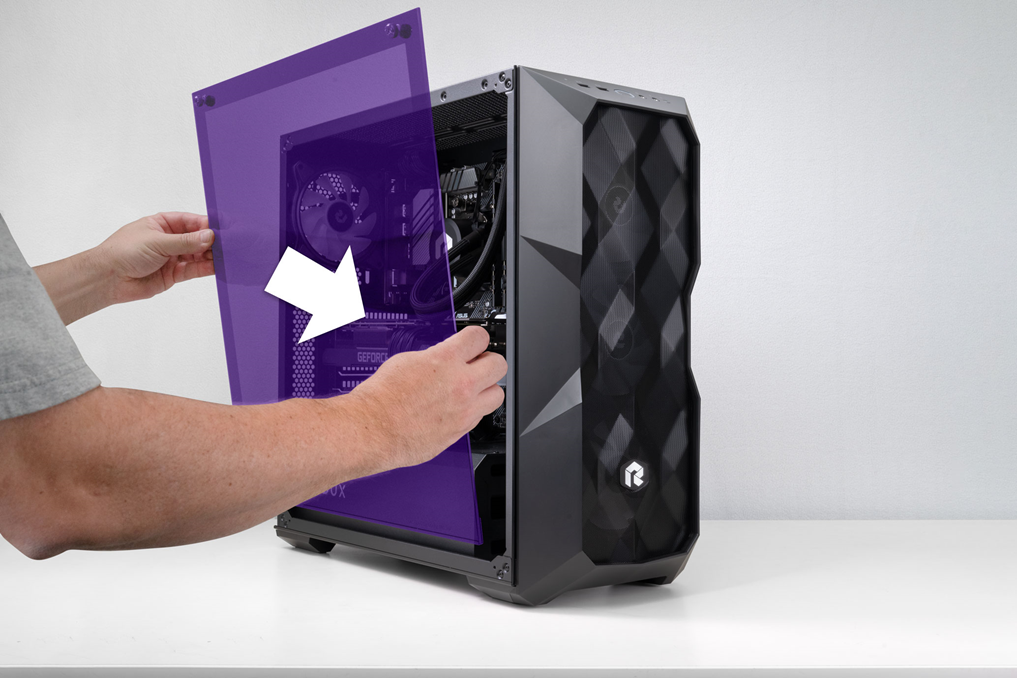
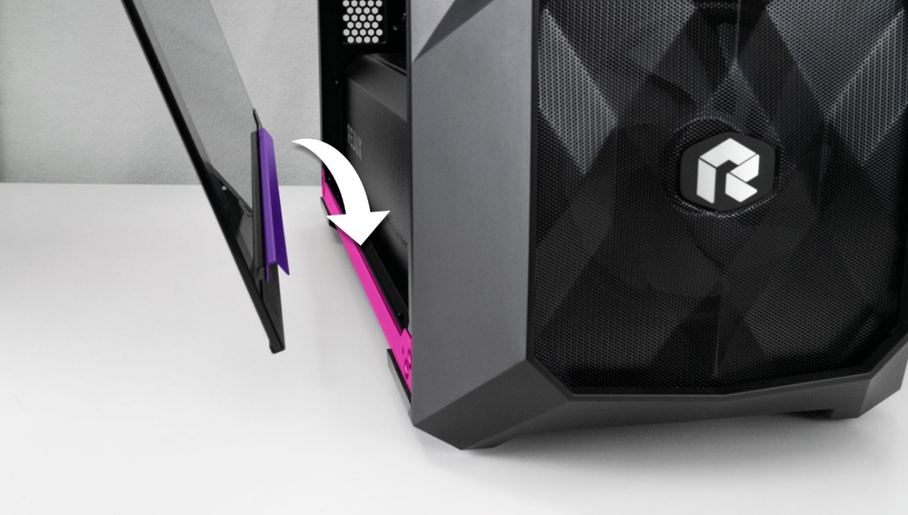
STEP 2: We need to access the inside of the PC to fix this issue. Gently hold the Glass panel to the case with one hand while unscrewing the 2 thumb screws until they are loose from the case. You don’t need to remove the screws from the glass.
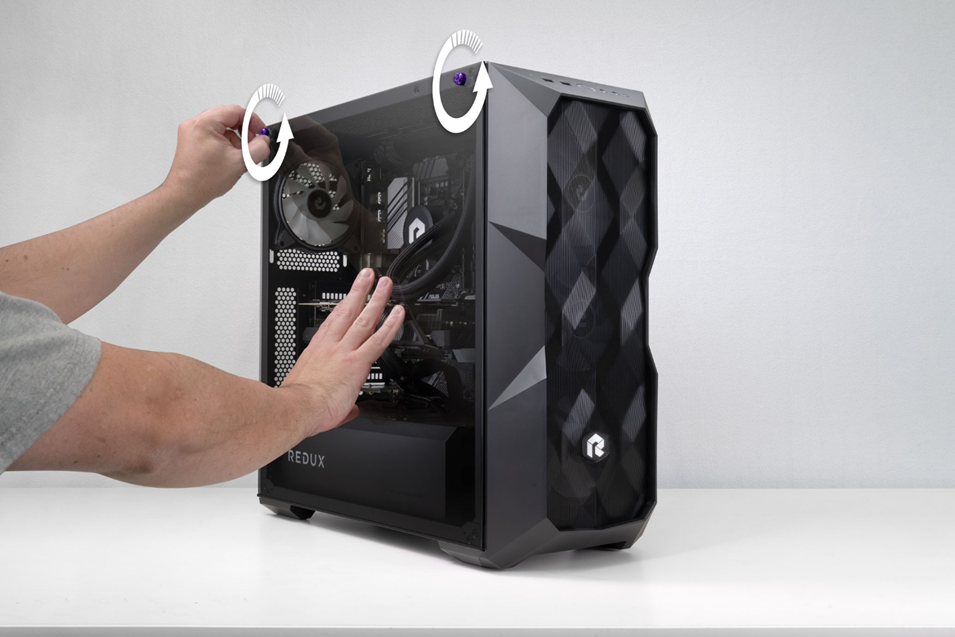
Screws are imbedded in glass. Don’t remove screws from glass panel.
STEP 3: Grab the glass panel firmly with both hands. Pull it away from the PC and gently set it aside.

STEP 4: Locate the I/O shield inside of your system, seen below.
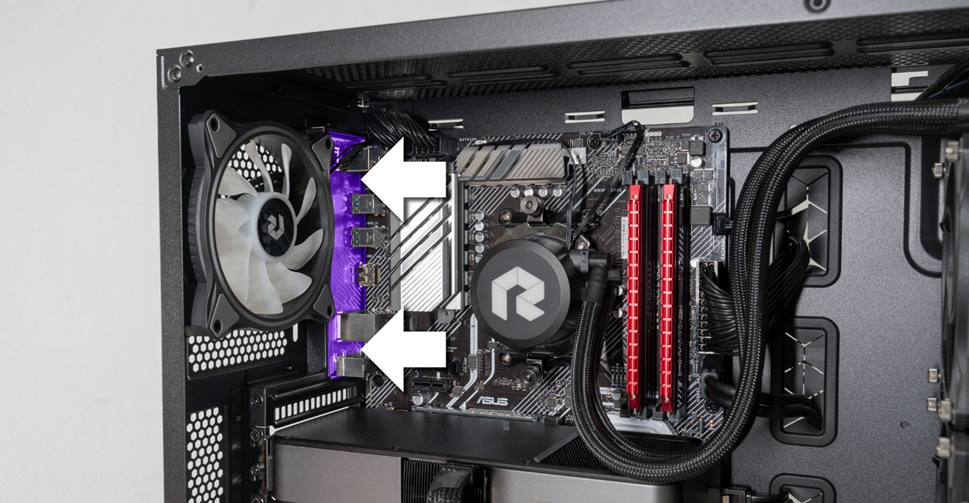
STEP 5: Gently press on the I/O shield plate’s surface and push in on it, causing it to bow out slightly toward the back of the case. Start pressing in the middle and press a few times along the length of the I/O shield.
This will bow the Shield outwards, pushing the metal tabs out enough to snap the mainboard and its ports back in place. While pushing, you may hear a few popping sounds as the mainboard settles back into place. This is normal and generally a good sign that things are moving into alignment.
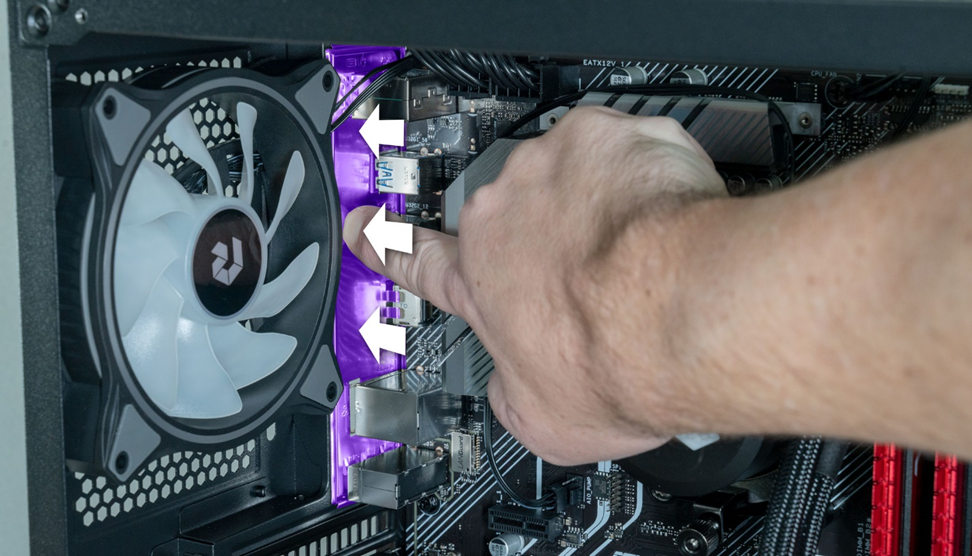
Press in at several places along the length of the I/O shield.
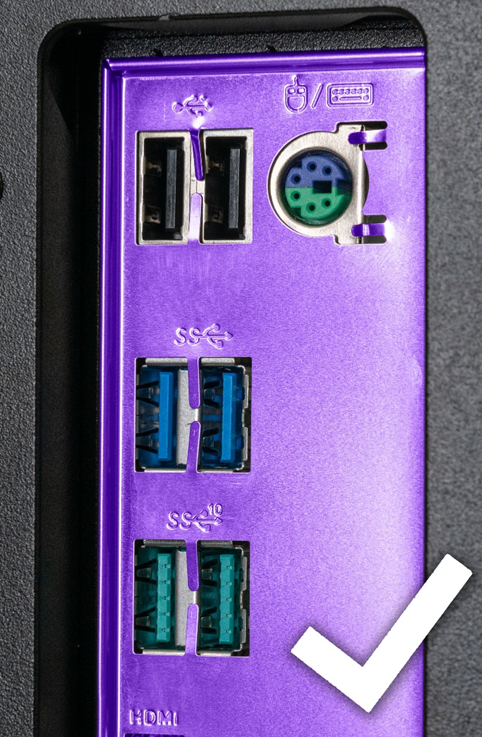
STEP 6: Inspect the backside of your computer and check your mainboard’s port alignment. Look at every port, checking for any obstruction.
 |
 |
|
These ports are aligned properly, allowing hardware to plugin without issue. |
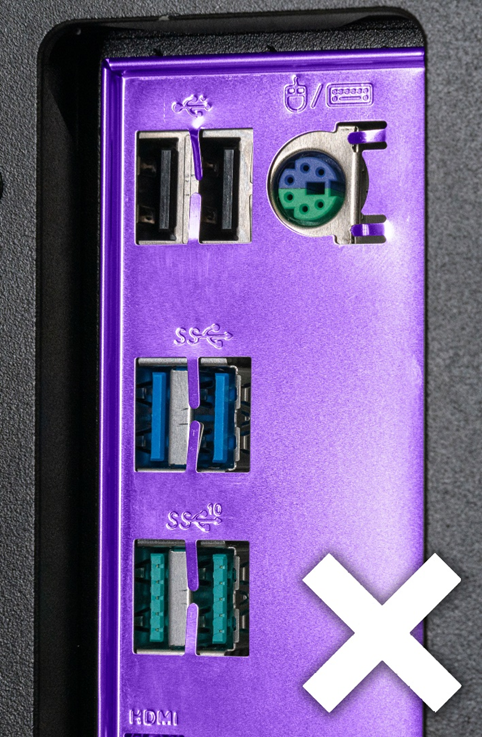
These ports are still misaligned. |
*Note* Even when properly aligned, you may see the small metal tabs offset to one side by a slight bit (1MM) on some ports. This is usually due to slight manufacturing height variances among components. If the port is clear and hardware can plug in cleanly, this is normal and nothing to worry about.
 |
 |
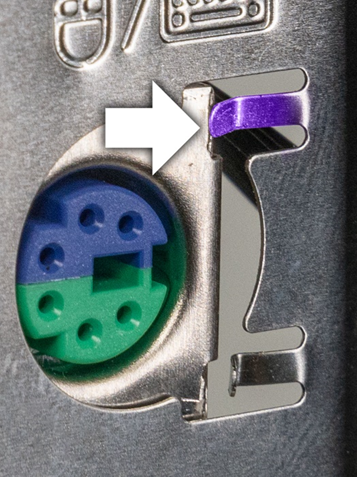
| This tab is jammed against the corner of our PS/2 port. |
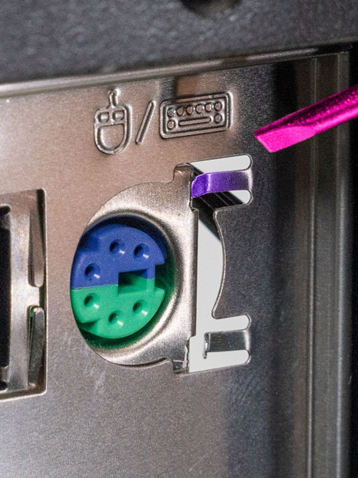
We can use a thin screwdriver, toothpick, paperclip, or any thin object to pry the tab loose.
|
 |
 |
|
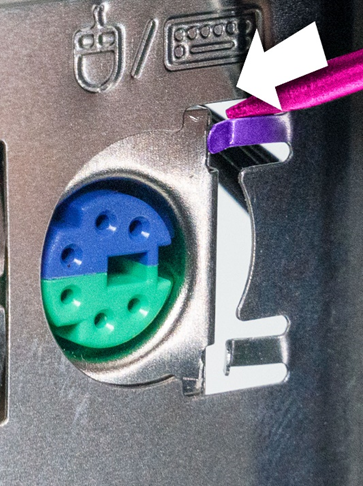
Place your prying tool behind the tab. |
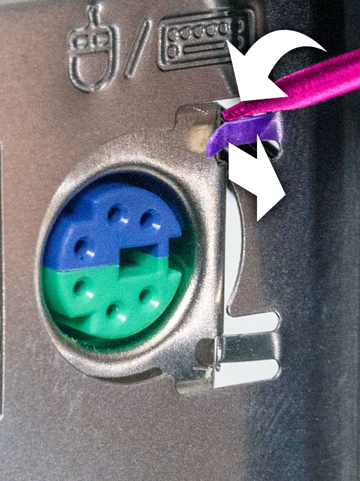
Gently pry the tab out, away from the port. You may have to do this to multiple tabs. |
STEP 8: Once your ports appear to be aligned, grab a few cables, and test the ports by plugging them in. your cables should plug in easily without much effort.
If you are still having issues plugging cables into your mainboard’s ports, there may be a different issue that is causing the misalignment. If you are still unable to plug in cables, please contact our support staff for further assistance.
Please feel free to contact our support staff at 1-856-390-7905
Or by filling out a support request form at https://buildredux.com/pages/support
STEP 9: If the mainboard is aligned properly, all that’s left is to re-install the glass side panel.
Grab your system’s Glass panel and align it next to your PC as shown below.
The Build Redux side panel has a bracket that sits on a small metal rail along the bottom of your PC.
Gently place the Glass panel’s bracket on the rail along the bottom of your Build Redux case.
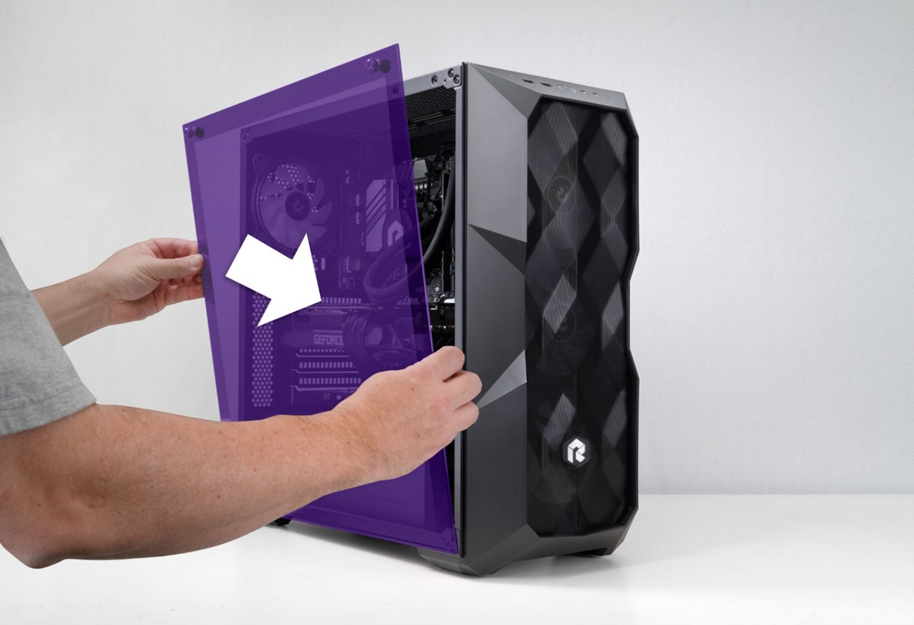
Once on the case, the glass panel can slide slightly from left to right, align the side panel screws with the holes in your case.

Gently push the glass panel up against the chassis. Continue to hold the panel against the system with one hand while securing the 2 upper thumb screws.

Your Build Redux PC should now be fully operational. If you are still experiencing issues or have any questions, please contact our technical support staff. They will be happy to assist you!
Please contact one of our support agents to assist you via (Submit Request) or email (support@buildredux.com)